You can add your company’s custom fonts to the Brand Center, assign those to font slots and package it into a font package. This package can then be published to SharePoint sites and taken into use, ensuring a consistent and branded look across your organization’s intranet. Microsoft Learn provides excellent instructions on how to accomplish this.
- Upload Fonts
- Upload your custom font files to the Brand Center. Ensure you have the necessary font formats, such as .eot, .svg, .ttf, and .woff.
- Disclaimer: Font settings cannot be fine-tuned further (e.g., font weight, letter spacing). If you need to make such adjustments, you can modify the font using a tool like FontForge.
- Create Font Package
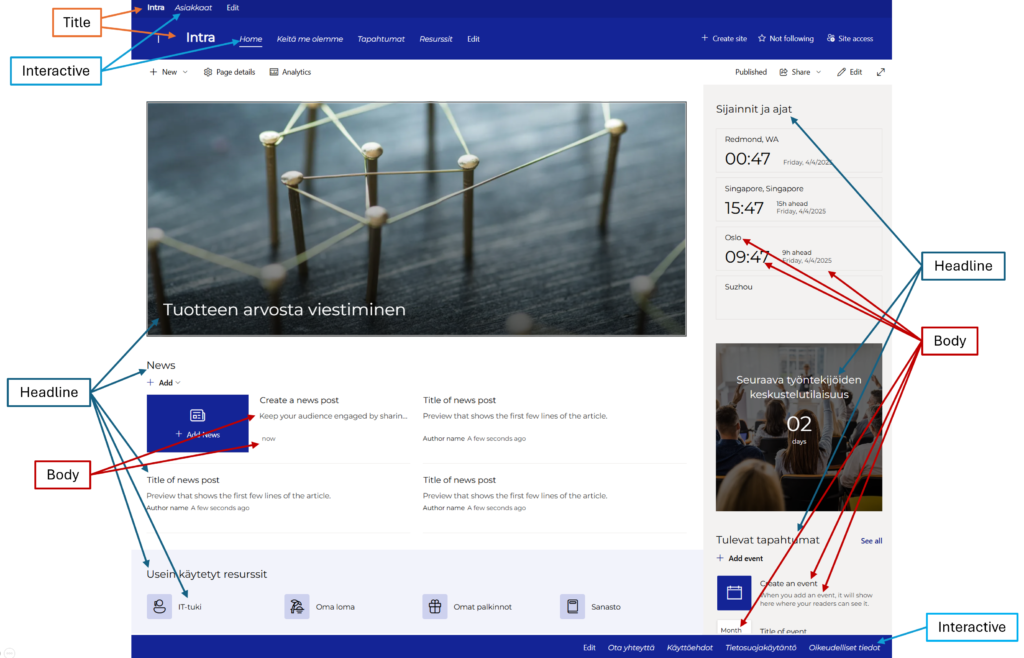
- Package the fonts into a font package with four slots: Title, Heading, Body, and Interactive
You can find very good instructions on how to do this also in Microsoft Learn.
Microsoft Learn offers detailed descriptions for each font slot, helping you understand their specific applications. However, it can sometimes be challenging to determine where each slot is used on a page. To address this, I’ve created illustrations that visually demonstrate how these font slots are applied.
By following these steps and utilizing the resources available on Microsoft Learn, you can effectively integrate custom fonts into your SharePoint sites, enhancing the visual appeal and brand consistency of your intranet.